Using and understanding OpenShift - Basics
by João Paulo Maidatags: DevOps, PaaS, Kubernetes
Red Hat OpenShift is a DevOps tool, which is acquired or sold as a PaaS, that really puts the customer into a new level. And when I say “a new level” I mean serious because the tool is complete. With one shot you can get all your apps deployed inside containers with all ease that Kubernetes brings.
And, by the way, I forgot to mention. OpenShift is built on the top of Kubernetes, so you can reuse all previous knowledge about Kubernetes, including kubectl CLI, architecture and enjoy at the same time a new level of abstraction. This new flavour has the objective to make some operations easier, provide a friendly interface to user and offer the ease to install other Red Hat products, such as AMQ or Red Hat Single Sign On, inside OpenShift [1].
An important question has to be made at this point: has a company unlocked all DevOps and Cloud-Native features just because acquired OpenShift? The answer is pretty simple, no. But understanding this common misunderstanding is not simple and would lead us to a detour in this article. What you need to know now is that OpenShift is able to make things happen faster, and when I say “things” I mean cultural and technological. But in order to achieve the so dreamed DevOps and Cloud-Native status is a long way maturing road.
So, without further due. Let’s get into it.
“Installing”
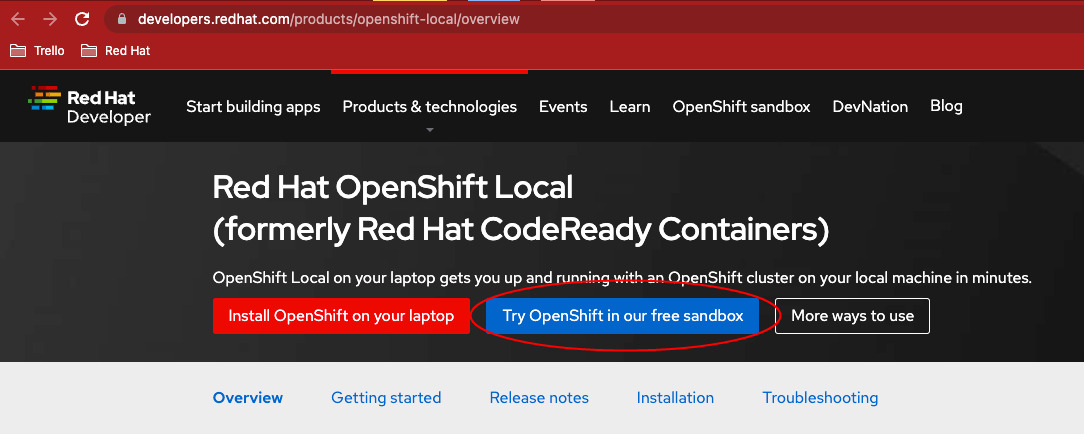
Access https://developers.redhat.com/products/openshift-local/overview and click on “Try OpenShift in our free sandbox” button.
You’ll be request a Red Hat account. If you don’t have it, create one.

Click on the button which starts the sandbox (usually is a red button in the top of the page). The following screen will be presented.
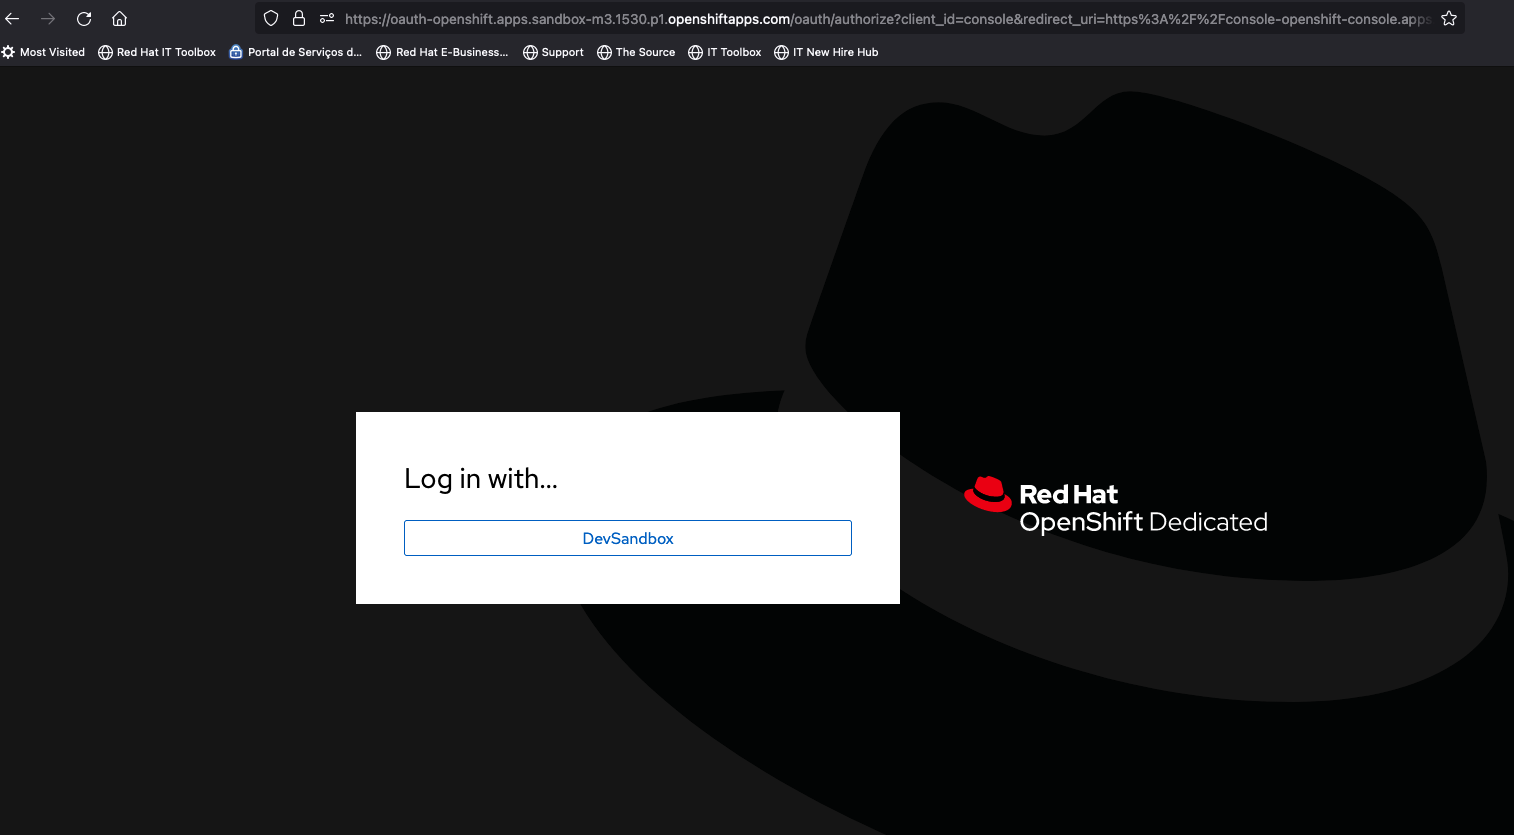
Use the “DevSandbox” option. You’ll be presented to OpenShift homepage. On the uppper right corner click in your login name and select “Copy login command”. You’ll be request again to select “DevSandbox”, click on it. A white page will be displayed with a blue hyperlink “Display Token”, click on it. Once clicked copy the oc login command, paste it into a terminal and hit enter. You are ready to go.
Basic Concepts
How your applications can run inside an OpenShift cluster ?
That’s quite simple. An application exists inside the OpenShift organism as a pod. A pod, which is concept from the Kubernetes world, is the smallest unit possible, can be reflected as a YAML or JSON artifact, and represents an instance of something running. Every entity in the OpenShift or Kubernetes world can be reflected in that fashion. Inside a pod you can have one or multiple containers. That brings an important question. What is the good practice about it? OPOC (One Pod One Container) or OPMC (One Pod Multiple Containers)?
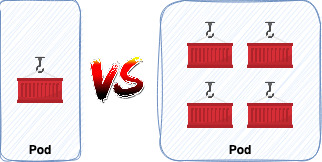
The answer is simple, there is none. It depends on the situation and you must have in mind: if one pod goes down all containers inside follow the same path. That’s your compass. You must take your decision based on that.
A pod doesn’t live by its own, it lives inside a namespace. A namespace is a logical division to workloads. Understand as a workload any productive applications that can run in a container and, therefore, are pods. You can easily find on the internet that there are some default namespaces in OpenShift, and that’s not a lie. OpenShift’s inside components are also divided into namespaces so you can easily find them and see how they work. A namespace is also important to divide applications in a semantic way inside an enterprise fashion. So, if your company has billing, staff, accounting, sales, and others departments you have a big chance to see that division reflected in namespaces. Usually, that’s a good approach because it continues the dialect that is spoken in the company.
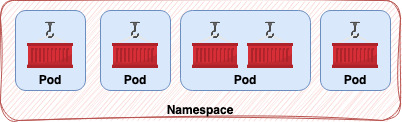
To make the subject here discussed more feasible lets imagine a namespace which concentrates an PHP application and its database.
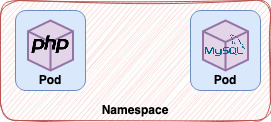
How this application can communicate with the database? I assume that you’re thinking about using the IP to directly close de communication, am I right?
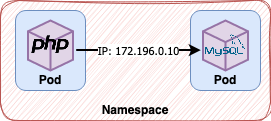
That would work, perhaps, just at the first glance, but in the very moment that any of these pods fails and gets deleted a new is generated, a new IP address is given to that pod. That is an important feature in OpenShift and in the cloud-native world. Pods consequently must be deleted and regenerated all the time in a fast way, so it’s implicit that application must have fast startup and shutdown times. So, in the end, you cannot use direct communication such as IP addresses or local storage like using the filesystem to store files or memory to data.
But the question remains: how a container can communicate with other in a safe way?
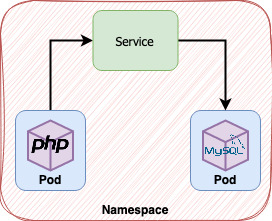
There is an element both present in Kubernetes and OpenShift called Service meant to resolve this issue. A service works like a DNS host, in other words, performs a search by a given name and redirects the request to the IPs registered above that name. But how would a service know the correct IPs to redirect to if containers receives new IPs all the time? Each service has a selector, a way to describe which pods it will bind. When a new pod is created there is or not a match and that pod and its IP get into line.
With this approach a consumer, the application in our scenario, doesn’t have to concern about where the database is. It only points to http://
But … what if application A tries to send a request to application B and B has multiple pods? How that would be handled? The answer is easy. OpenShift/Kubernetes services act as a load balancer. Once you hit the patterned URL shown above, the service will handle the rest, and the load-balancing algorithm can be customized in OpenShift scenarios. So, in an enterprise scenario expect multiple pods and services, it’s rare to see an application without service.
Using the same scenario (application + database), how would this application be accessed by a client outside the cluster? The routing layer comes to action.
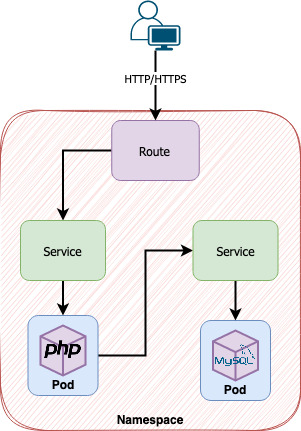
There is an entire routing layer dedicated to address this issue. So, if users or applications that live outside the cluster need to communicate with our application, they both can use this layer to achieve this goal. A route is an exclusive OpenShift object that basically connects itself with a service and exposes a URL to external access. Non-secure or secure use cases of the HTTP protocol are addressed in this object.
So, following the breadcrumb trail, a request comes from an external client (user or application) and is received by the route. The route redirects the call to the service and the service acts as a load-balancer redirecting to the pods.
A common question is: can my application send/receive data using the route even if it’s communicating with an application which is deployed inside the cluster? Yes, you can but you are overheading the communication because the service layer already gives you the opportunity to communicate using plain HTTP.
Now you have in your pocket what can be considered the basis related to how OpenShift works and handles applications. But we, as software engineers, know that there is a huge amount of concerns that live around these simple concepts. One of these concerns is: how an application could be updated on OpenShift? In our example, the application PHP had some improvements and a new version must be deployed. How that would be addressed using OpenShift?
A Deployment is a Kubernetes object widely used and adopted in OpenShift 4 to hold deployment configurations. A deployment holds the template of the future pods, so in this scenario, a pod brings the configurations defined in the deployment. And what configurations would be? The used image, environment variables, name, labels, volumes, and probes are just a few of what can be found there. Based on all that a pod can be created.
Is always necessary in order to create a pod to create a deployment? No.
You can create pods by writing its definition (YAML or JSON) by yourself. The use of a deployment is to make all easier. If a pod gets deleted, using deployment, a new one is created automatically because every deployment works along with a Replica Set. The Replica Set is the object responsible for guaranteeing that the number of replicas configured in one deployment will actually exist. This object is created automatically by OpenShift when a deployment is created and the application’s rollout is done. So our study scenario can be described in the image below.

One thing is important to consider. According to the third factor [3] in the 12 Factor-App methodology [2] configurations should be both consumed and stored as environment variables. So, to address this concern there are two kinds of objects in the Kubernetes/OpenShift world, ConfigMaps and Secrets. They are like cousins and usually walk together but with one difference. Secrets encode (base64) their data because are meant for sensitive data and Config Maps handle ordinary configuration data.
So, using our scenario to explore these new objects we would have.
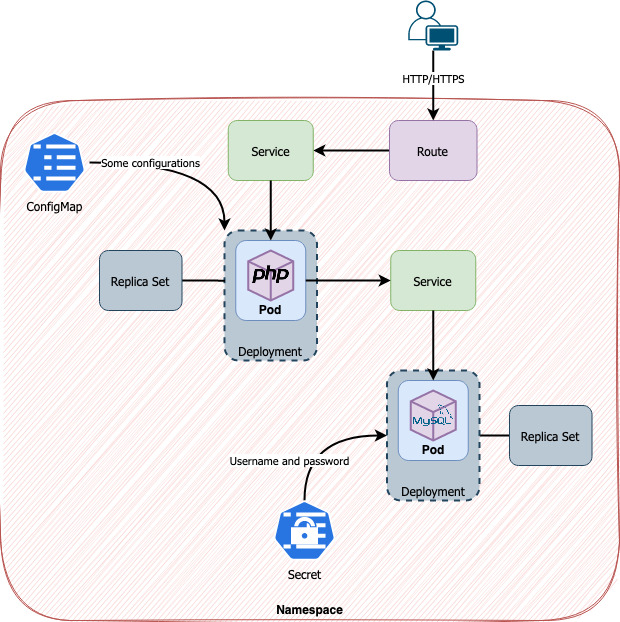
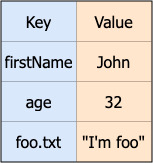
In both ConfigMaps and Secrets data can be stored as key-value pairs or as files. Using key-value pairs data will be mounted as environment variables in a deployment and therefore in pod(s). Using as files data will be introduced in configmaps or secrets using key-value pair mode but the key will be the file’s name and value its content. OpenShift can notice the difference and mount the data as a file using a determined path. Use reference [4] for more details if you’re interested.
That ends what you need to know about the basics in Kubernetes/OpenShift.
Deploying your first application
So far we understood all the basic concepts in Kubernetes/OpenShift we’re ready to deploy our very first application. You can find several examples on the internet of how to do that but just in a few, you’ll understand how the process works behind the curtains.
One of toppest features of OpenShift is the S2I process. The S2I process can be comprehended by the source code transformation into a container image. Of course, there is no black magic related to this and details about the process can be found in the docs [5]. But in a nutshell, OpenShift can detect the application runtime (Java, PHP, .Net, Golang, etc) using some verification such as finding an index.php or a pom.xml file, based on that selects the best base image present in the Red Hat Catalog and finally builds an optimized image.
That opens a good discussion about containerization strategies because S2I goes in the opposite direction when compared to Dockerfiles/Containerfiles. It’s possible to perform S2I even when there is a Dockerfile but the S2I process eliminates the need of a Dockerfile. So, what’s the best?
There is no accurate answer to that. You’ll have to decide what is the best approach. One simple rule that I follow is: if your application is just some simple application that has no special requirements such as OS packages or sidecars go with the S2I. But if your case is the opposite, use Dockerfiles.
Let’s do some coding now !!!
We’ll use a sample application written in Quarkus to show how easy is to deploy an application on OpenShift. The first thing to have in mind is that you must be logged in OpenShift. If you’ve done the “Installing” section you’ll have no problem.
Using the free sandbox as shown above a namespace is already created. We’ll use that. Execute on a terminal the following instructions.
oc import-image ubi8/openjdk-11:latest --from=registry.access.redhat.com/ubi8/openjdk-11:latest --confirm -n <namespace>
oc new-app openjdk-11~https://github.com/jpmaida/todo-list-quarkus#quarkus-2.0.0.Final-relational-db -n <namespace>
What just happened ?
Our application needs an OpenJDK 11 image and the cluster cannot provide that, so we need to import it. The importing process comprehends an image stream creation. The ImageStream object is responsible for managing images with different tags but under the same repository [6]. That’s what the first command does. The second command is where the real magic happens, the S2I process. Let’s get into details.
If you type oc new-app -h in the terminal you’ll be presented to the help utilitary. Each oc command has this -h feature.
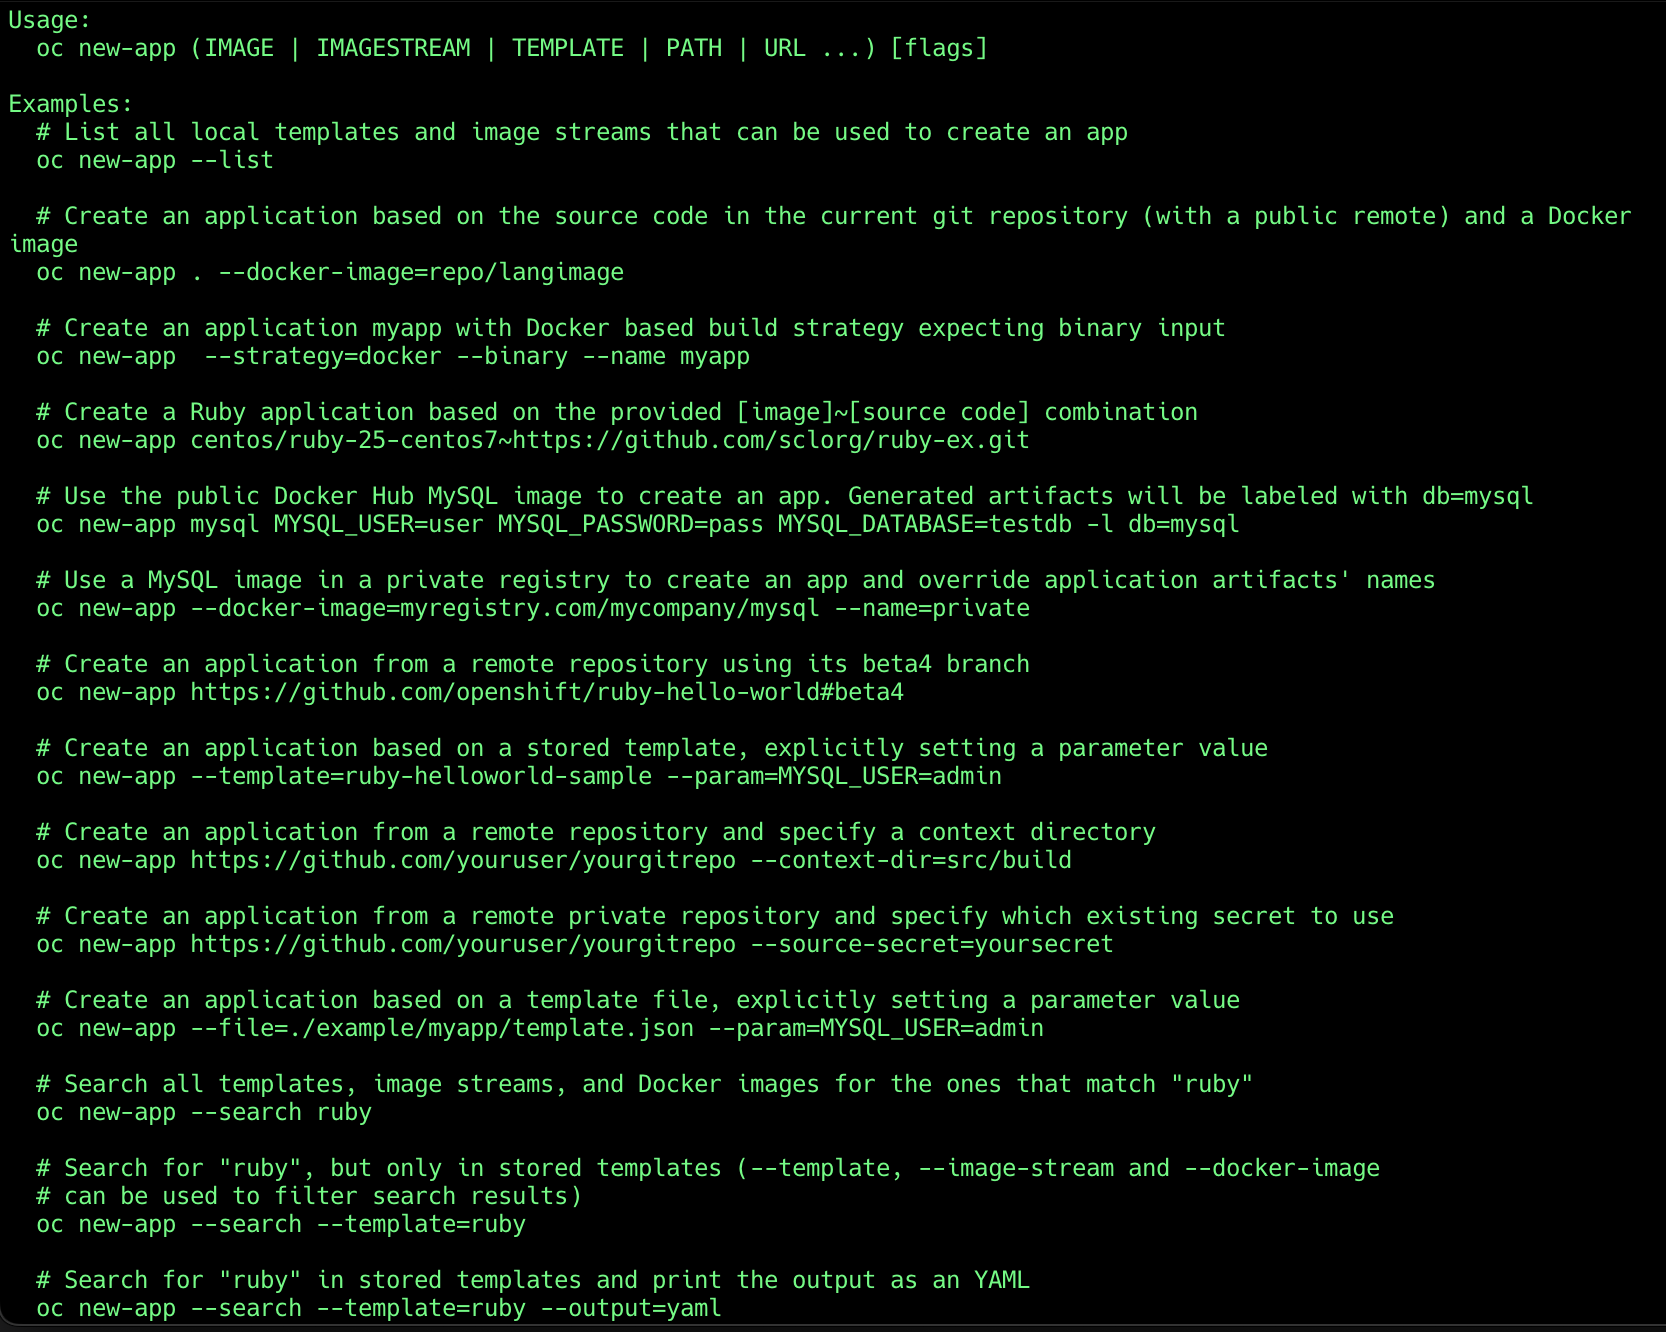
There are numerous ways to use the oc new-app command in order to perform the s2i process. The way that we are using represents the following:
oc new-app <imagestream>~<git-repo-url> -n <namespace>
The oc new-app command downloads the source code from the git repo, determines the application’s runtime, and assembles the image stream provided with the source code to generate the image. The generated image is written inside the namespace provided. Using this approach the application’s image stream applies the latest tag on the image. This method is really useful when the git repo used is public.
There are some typical situations when using oc new-app, they are:
- If the image stream is omitted the oc client determines the image stream to be used
- If the git repo is private is possible to use env vars in order to configure credentials
- If you need to specify one particular tag on the image stream in the
oc new-appuse:oc new-app openjdk-11:1.15~https://github.com/jpmaida/todo-list-quarkus#quarkus-2.0.0.Final-relational-db -n <namespace> - If you need to specify one particular git repo’s branch use:
oc new-app openjdk-11~https://github.com/jpmaida/todo-list-quarkus#quarkus-2.0.0.Final-relational-db#<some-wild-branch> -n <namespace>
One other approach which I like most to create applications using s2i is:
oc project <namespace>
oc import-image ubi8/openjdk-11:latest --from=registry.access.redhat.com/ubi8/openjdk-11:latest --confirm
oc new-build --name=<name> --image-stream=<image-stream>:<tag> --binary
oc start-build <build-name> --from-file=<path-to-package> --wait --follow
oc new-app --name=<application-name> --image-stream=<application-image-stream>:<tag>
I know … a lot of commands … I know. Let’s go step-by-step.
oc projectis used to point to some specific namespace so you don’t need to specify the-n <namespace>in each commandoc import-imagewe already knowoc new-buildcreate a new BuildConfig and ImageStream objects using the image stream provided as basis. We’ll understand further what those objects dooc start-buildcreates a new build using the configurations present inside the BuildConfigoc new-appcreates an application instance (deployment + service + pod) using the image stream provided as base image
The BuildConfig object is responsible to hold configurations related to the building process. The oc new-app command, shown above, creates a brand-new BuildConfig to download the application source code. The building process here will upload the package informed in oc start-build command and process it in order to create the application’s image.
If you need more than one file to upload when using the oc start-build you can use the --from-dir flag. This flag uploads an entire directory. This strategy is really useful when you have more than one package to upload or when you want to upload an entire directory full of source code.
For most Java applications I use the --binary combined with --from-file flag but there are some cases when --from-dir is really useful. For .NetCore and PHP applications I use --from-dir flag combined with the source strategy. The source strategy is the default strategy when the --binary flag is not informed.
One thing important to consider: if you don’t want to feel yourself tied to the oc client, is possible to use the s2i client which is opensource. The s2i client can generate optimized Dockerfiles or perform the very s2i process.
Conclusion
OpenShift is indeed a complete tool/platform if your need is application’s orchestration. However, is not because you’re using it, it implies that you are safe and 100% in compliance with the cloud-native paradigm. It takes a lot of effort to get there and, perhaps, in the end of all the cloud-native title might be an utopia. I didn’t have so far an experience with real cloud-native applications. The majority of scenarios are monoliths that were modified (in the smallest aggressive way possible) to run on an OpenShift cluster or not so well defined microservices which were built under a very-grained perspective causing a blast in the number of microservices.
In both scenarios OpenShift was just a tool to host these applications. Some resources were misconfigured causing a waste of resources and there wasn`t any initiative to extract what the platform could best provide. My truth is that is not so hard to achieve, the only thing it takes is planning and some basic knowledge, which this article provides. The simple arrangement of a good namespace architecture combined with a good deployment strategy delivers a lot of value.
I mentioned that planning and knowledge aren’t things so hard to achieve. Knowledge you can find turning each corner, the offer of courses and tutorials is huge nowadays. The planning continues to be simple but just a little bit more laborious. If you face a migration to OpenShift or Kubernetes from the virtual machines world, you cannot do all the migration in one hit and expect that works. You have to move piece by piece, that’s planning. Each piece that you move must have a mapping about the impacts that the change causes and a measure about the effort. That’s the only way to achieve the best scenario possible, there aren’t silver bullets.
References
- https://www.redhat.com/en/technologies/cloud-computing/openshift
- https://12factor.net/
- https://12factor.net/config
- https://kubernetes.io/docs/tasks/configure-pod-container/configure-pod-configmap/
- https://docs.openshift.com/container-platform/4.8/openshift_images/using_images/using-s21-images.html
- https://docs.openshift.com/container-platform/4.10/openshift_images/image-streams-manage.html

If I have seen further it is by standing on the shoulders of Giants.techmaida.blog@gmail.com